How To Make An Icon From A Picture
Ever wondered how create an icon from your own images? well scartissue's is going to show you exactly how to do that in this GIMP tutorial.
Getting Started
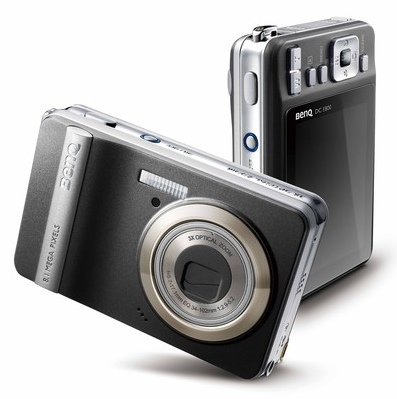
The first thing that must be done is to find a picture. I found one on google with a nice camera. To use it

Step One
Okay, once you open a picture, right-click on the first layer and select "Add Alpha Channel."
Step Two
Insert a Quick Mask (or press Shift+Q). The screen should turn red. Now, use the eraser tool and erase the red over the camera.
Then press the Quick mask button again (or Shift+Q) and you should see the camera selected.
Step Three
Go to "Select>Invert" (Or press Shift+I). Now everything but the camera should be selected. Press delete. Now you should only see the camera surrounded by black and grey squares.
Step Four
Now go to "Image>Canvas Size..." a pop-up should come up. Next to the "width and height" boxes, click on paper click and make it break. Then change the width and height to a size that shows the camera well. Make sure that the final width and height are the same number.
P.S. don't forget to change the x and y offset as needed.
Step Five
Right-click on the layer now, and select "Layer to Image Size." The layer boundary (the black and yellow line) should now be the same as the canvas.
Step Six
Now you MAY change the colour of the camera to get a better effect. To do this, go to "Color>Colorize... and mess with the settings until the camera looks good.
(These are the settings that I used)
Making It into an Icon
Step One
Whenever you make an icon, if you have it bigger then 256x256, you will have five final layers. What you must first do is copy the first layer.Then select the Scale Tool (or press Shift+T), and shrink the image to 256x256.
Step Two
Now go to "Image>Fit Canvas to Layers" now the canvas should match with the layer boundary.
Step Three
Paste the copied layer and then go to Layer>New Layer..." (or press Shift+Ctrl+N). Then select the Scale Tool again (or press Shift+T). Shrink the pasted layer to 128x128.
Repeat this step three more times, shrinking the image then to 48x48, 32x32, and 16x16.
Step Four
Now look through the layers (you should have five), and see if any of them look blurry. If they do, select the layer and go to "Filters>Enhance>Sharpen..." and sharpen as necessary.
Step Five
Now go to "File>Save As..."(Or press Ctrl+Shift+S) and save it in your desired folder as camera. Don't forget to set the extension as .ico
A pop-up should come up asking whether or not to compress the 256x256 layer. Check the box and click Save. (Compressed PNGs are supported by Vista's, because Vista has a zoom feature. But since Xp doesn't have this feauter, compressing it makes the larger icons work in Vista, and the other icons work in XP.)
AND YOU'RE DONE!
Now you have a very real camera icon!
Subscribe for N10-004 dumps training sessions to guarantee pass 640-760 exam.Also get free download link for the next testking 70-515 exam, after getting success in 70-270 & testking 156-915.71,you can find a wonderful job.
- 220121 reads


Simple but useful! First :P
Simple but useful!
First :P
Great use of quick mask to
Great use of quick mask to cut out the image scartissue, thanks for the tutorial
Nice idea!
Nice idea!
Thanks everyone!
Thanks everyone!
Do you know? the people in
Do you know? the people in the world need someone like u!
really! i love u! :D
oww i don't (i am not gay hiihihiihi)
but anyway these contents will usefull enough! keep it work!
Simple... And fantastic!!
Simple... And fantastic!! thank you very much, make more tutorials like this and is posible that i die of happiness!XD
Good bye from... umm i can't remember :-P
I don't seem to understand
I don't seem to understand the Shift+Q bit. Because I'm using GIMP 2.6.6 it's quite annoying coz' i can't seem to follow the instructions, coz' it's really hard to fing the buttons. Example. Shift Q is Quit on GIMP 2.6.6. please help .
That's good man, very good.
That's good man, very good. I'm using gimp 2.6.6 , I use the free selection to cut is my opinion, for me is more easy in this version.
Está bueno acere, creo que es sencillo pero es algo que todos a veces queremos hacer para un proyecto crear nuestro propio icono.
Saludos cordiales desde Cuba Michel
Best regards from Cuba michel.
ive got gimp 2 too but you
ive got gimp 2 too but you are pressing wrong! control + q = quit. press the button over there ;J
I use GIMP 2.6.6. I think you
I use GIMP 2.6.6. I think you just pressed ctrl Q that's why its prompting the quit option.
The picture links semm to be
The picture links semm to be broken.
To open a quick mask without
To open a quick mask without using the keyboard shortcut: In the canvas window, look at the bottom left corner. There you should see a little box with a small red square in it, or, depending on your GIMP, it might just have a grey square in it. Click on it and the screen will turn red.
this is a great tutorial. I
this is a great tutorial. I will try this to add some icons to my website. is there a new software update for this.
Registry Restore
right, I am totally new to
right, I am totally new to any photoshopping software and just intalled gimp, only to find I can't do anything with it. I just haven't got a clue how anything is supposed to work, Ive been playing with it but - alas - I'm not getting any wiser.
I was hoping that this tutorial, if not for my immediate benefit, would at least be easy to follow and I can start experimenting properly with this software.
SO why am I stuck on step 1? I copied the image, opened it in Gimp, then the instructions above says:
Okay, once you open a picture, right-click on the first layer and select "Add Alpha Channel."
Not knowing what layers are, I just click anywhere on the picture (right click) choose select and......search in vain for this 'add alpha channel command'. So I give up and go through ALL the menu's trying to figure out if it's mentioned or hiding somewhere but to no avail. And so I am stuck on even the very first step.
how am I supposed to get this 'add alpha channel' option?
download the gimp update -_-
I get completely lost at step
I get completely lost at step one of making the icon.
As a beginner, I don't understand what to do and you don't explain it very clearly. You say if the image is bigger than 256x256 you'll have five layers. Okay fine. then you say copy the first layer and then select the scale tool and shrink the image to 256x256.
And this is where there's a problem b/c my image doesn't fit in that box. I'm using a picture. I want the picture to be an icon. The ENTIRE picture, not just a piece of it. If I shrink the image to 256x256 I lose the majority of the picture. What am I supposed to do? How do I use the full shot and not just a piece of the face, because that's all I get when I shrink it to 256x256, a piece of the face :/
Post new comment